
Overview
Microsoft 365 makes it easy to share files stored in OneDrive or SharePoint with colleagues, students, and external users (when permitted). This guide explains how to share files and manage access permissions.
Share a File from Microsoft 365
Step 1: Sign In to Microsoft 365
- Open a web browser and navigate to https://www.office.com.
- Sign in using your LSUA email address and password.
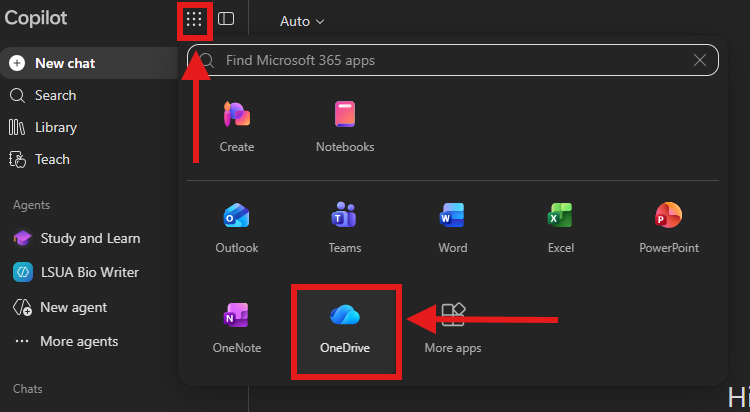
- Select OneDrive from the Microsoft 365 app launcher.
Step 2: Locate the File
- Browse to the file you want to share.
- There are multiple ways to share a file.
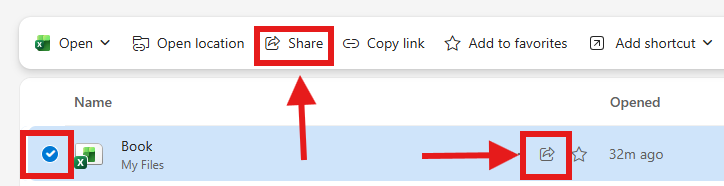
- Hover over the file and click the Share icon, the symbol to the right, next to the star.
- Right-click the file and select Share.
- Or select the file, to the left of the file name (blue check), and then select the Share button above the file.
Step 3: Choose Sharing Permissions
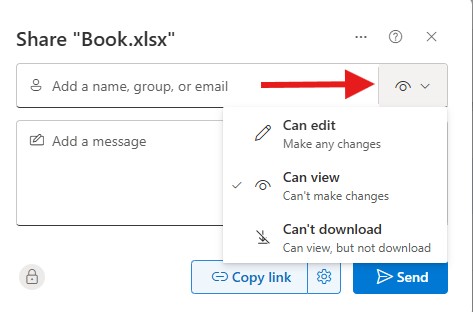
When the sharing window opens, select the permissions you want to grant by clicking on the dropdown menu to the right.
Permission Options
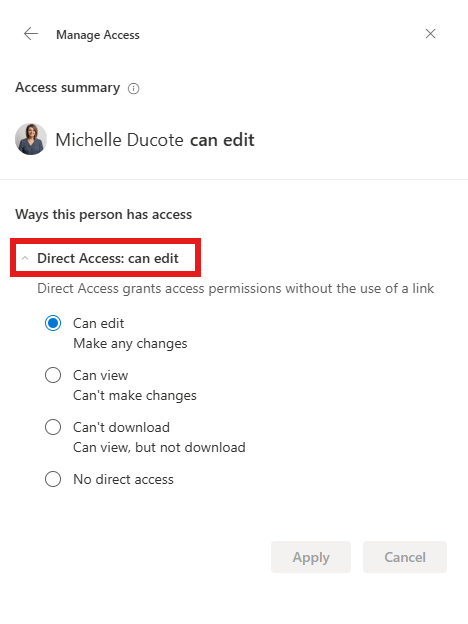
- Can edit: Recipients can view and make changes to the file.
- Can view: Recipients can only view the file.
- Can't download: Recipients can view, but not download the file.
To change permissions:
- Select the permission setting from the dropdown menu.
- Choose Can edit, Can view, or Can't download.
Step 4: Share the File
You have two options:
Option A: Send Directly to Individuals
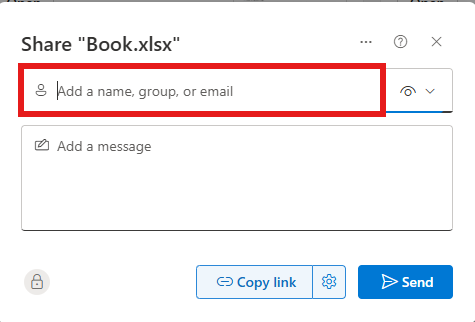
- Enter the recipient's name or email address.
- Add an optional message.
- Select Send.
Option B: Copy a Link
- Select Copy Link.
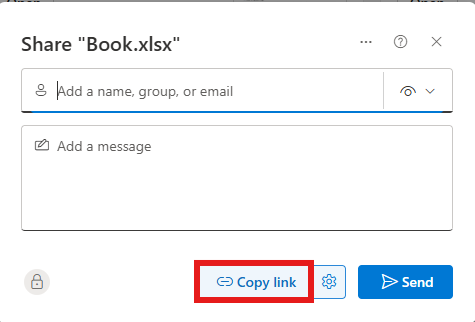
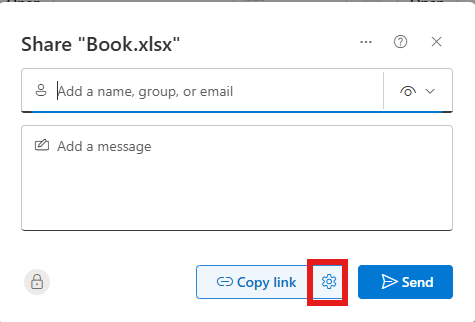
- Configure the link settings if needed by clicking on the gear symbol next to the Copy link button and choose your lin settings.
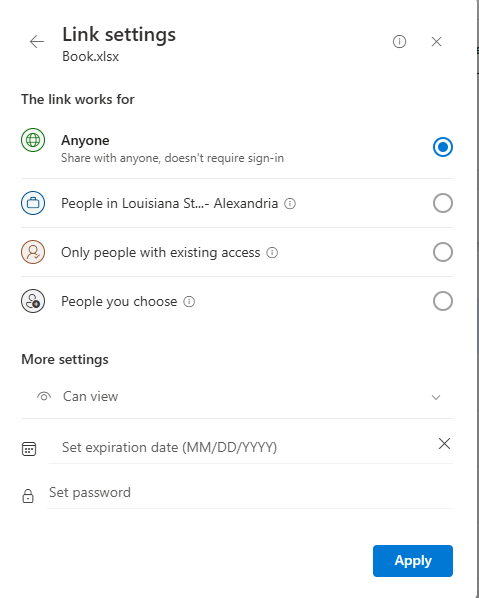
- Select Apply.
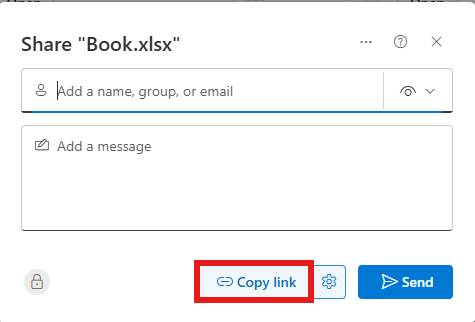
- Select Copy link.
- Paste the link into an email, Teams chat, or other communication method.
Manage Shared Files
View Current Access
- Locate the shared file in OneDrive.
- Select the file.
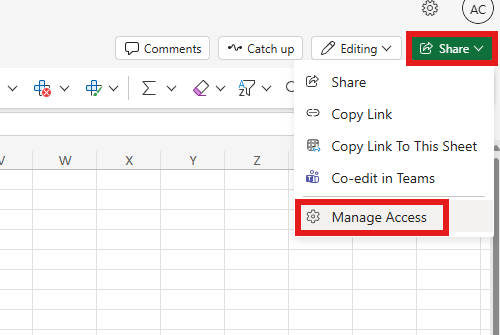
- Once the file opens, select the Share button in the upper right corner of the screen, then select Manage Access.
Change Permissions
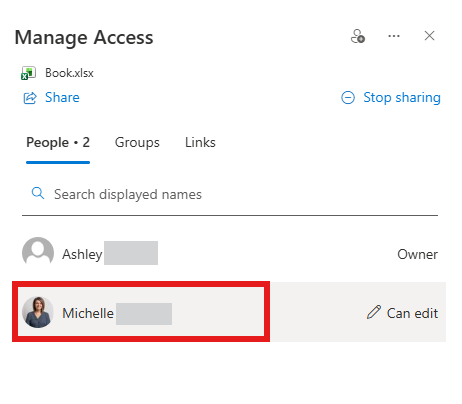
- Under Manage Access, select the user or link.
- Choose a different permission level by clicking on the access the person currently has and selecting different access:
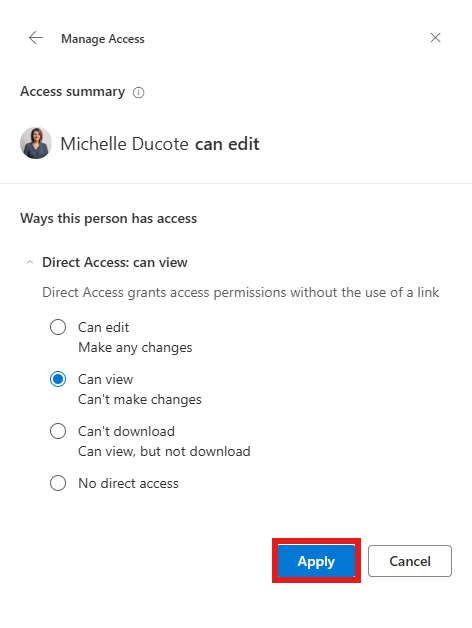
- Save your changes by clicking on the Apply button.
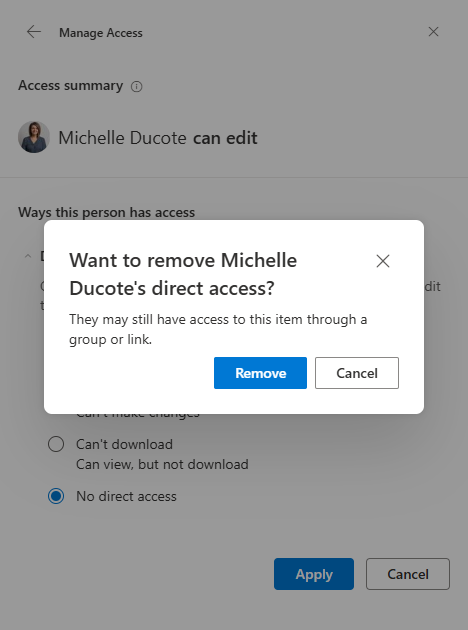
Remove Access
- Open Manage Access.
- Select the user or sharing link.
- Click No direct access, then Apply. A window will pop up asking if you want to remove that person's direct access.
Best Practices
✅ Share files from OneDrive rather than emailing attachments whenever possible.
✅ Use Can View permissions when recipients do not need to edit the file.
✅ Periodically review shared files and remove unnecessary access.
✅ Verify permissions before sharing sensitive university information.