
What is Microsoft Bookings?
Microsoft Bookings is a scheduling tool included with Microsoft 365 that allows others to view your availability and book appointments without needing to email back and forth.
Common faculty uses include:
- Student advising appointments
- Office hours
- Academic support sessions
- Department meetings
- Virtual consultations
Step 1: Open Microsoft Bookings
- Sign in to your LSUA Microsoft 365 account at https://office.com
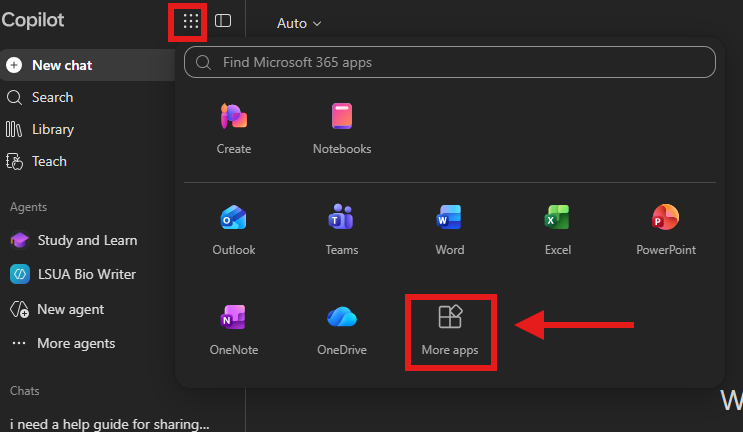
- Select the App Launcher (nine-dot menu) in the upper-left corner.
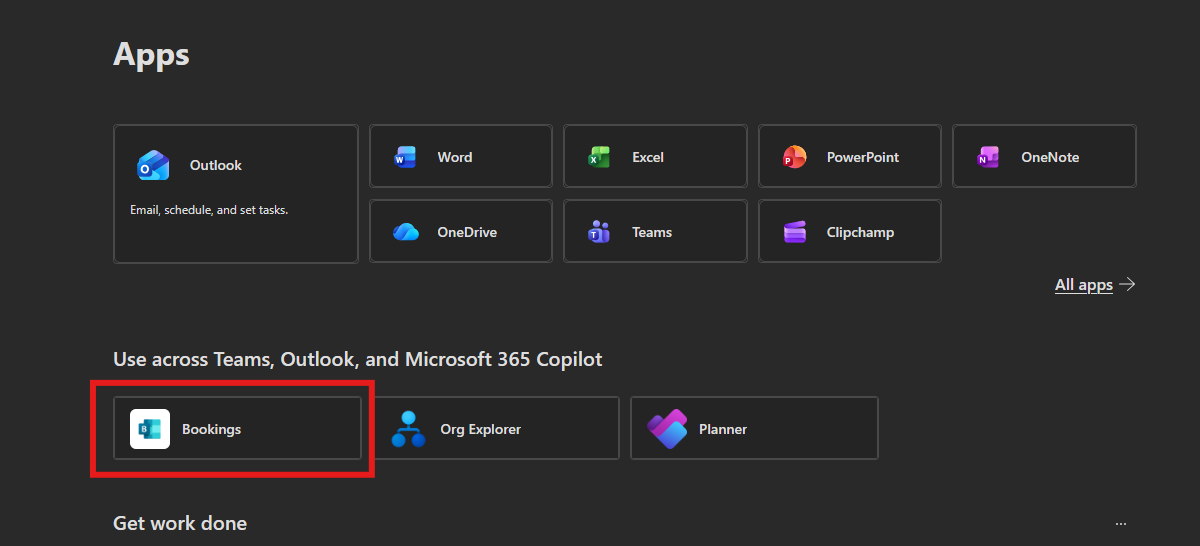
- Choose Bookings.
- If Bookings is not visible, select All Apps and search for Bookings.
Step 2: Create a Booking Calendar
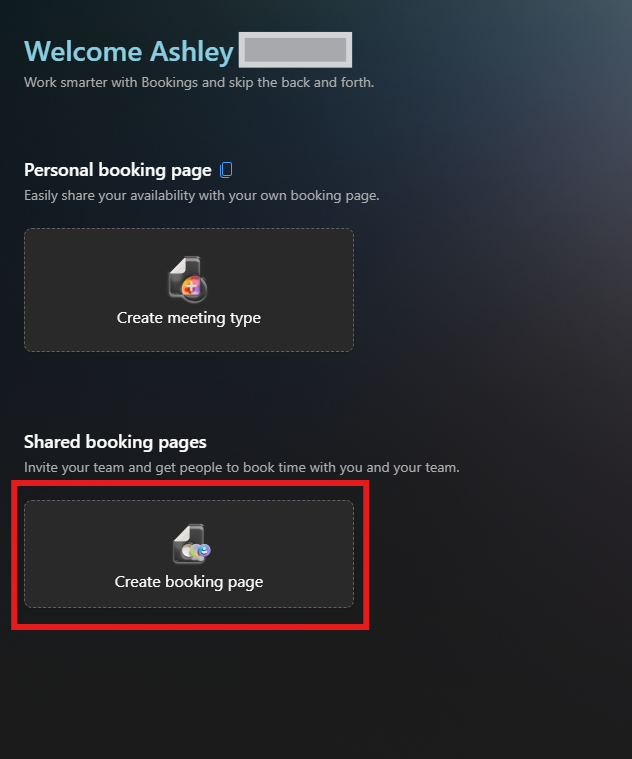
- Select Get Started or Create Booking Page.
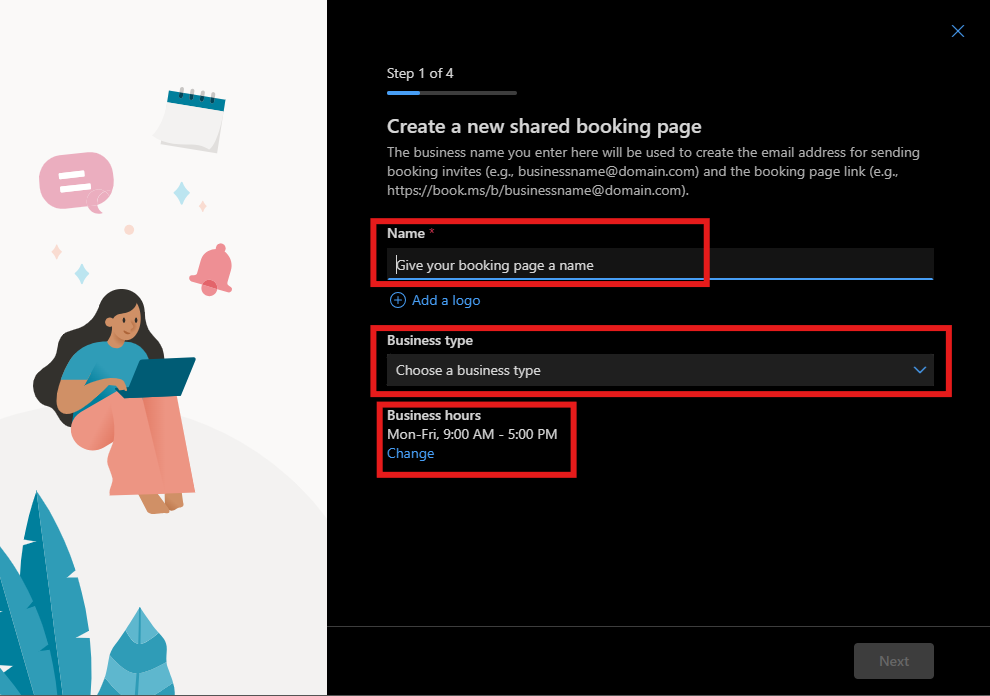
- Enter:
- Business Name (Example: "Dr. Smith Advising Appointments")
- Business Type (Education - Optional)
- You can also update your Business Hours
- Select Next.
- Invite staff (Optional). Select Next.
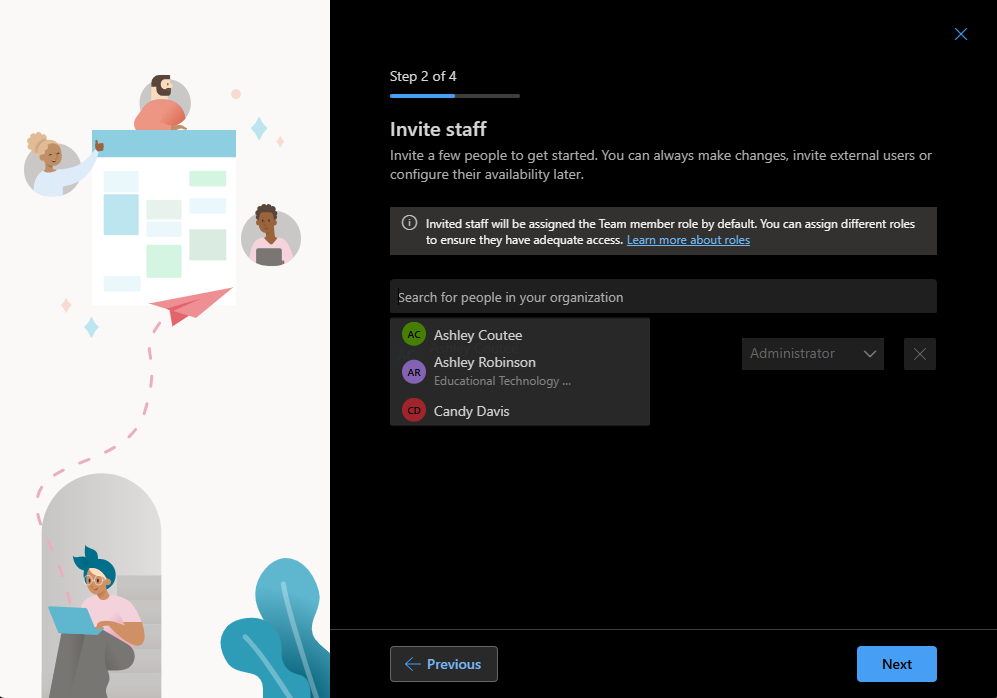
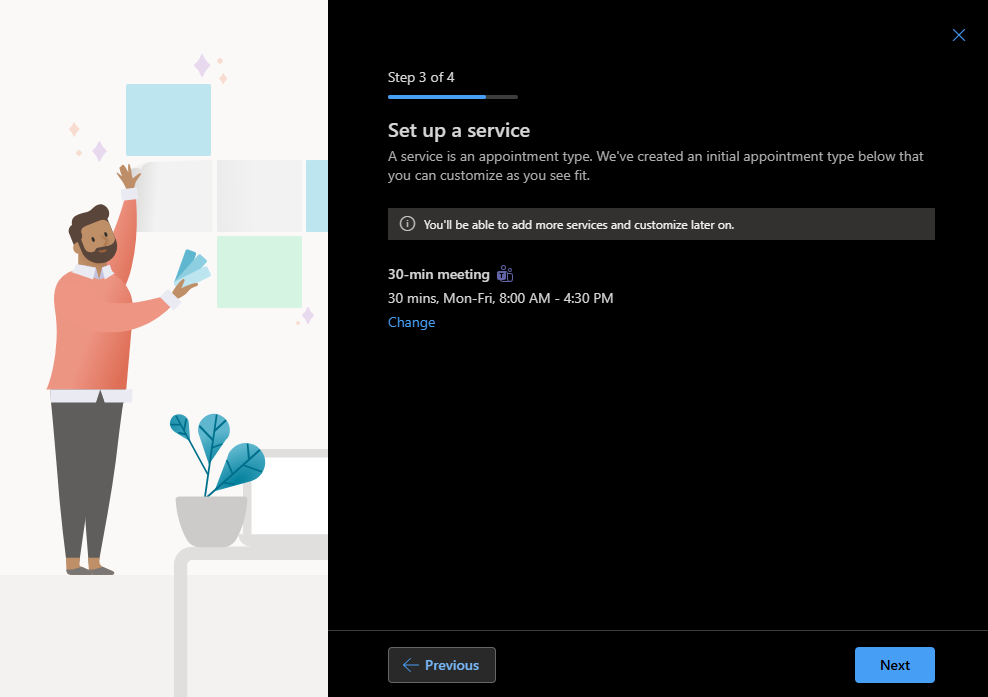
- Set up a service window will appear. You can adjust this now or later. Select Next.
- Choose who can book appointments window will appear.
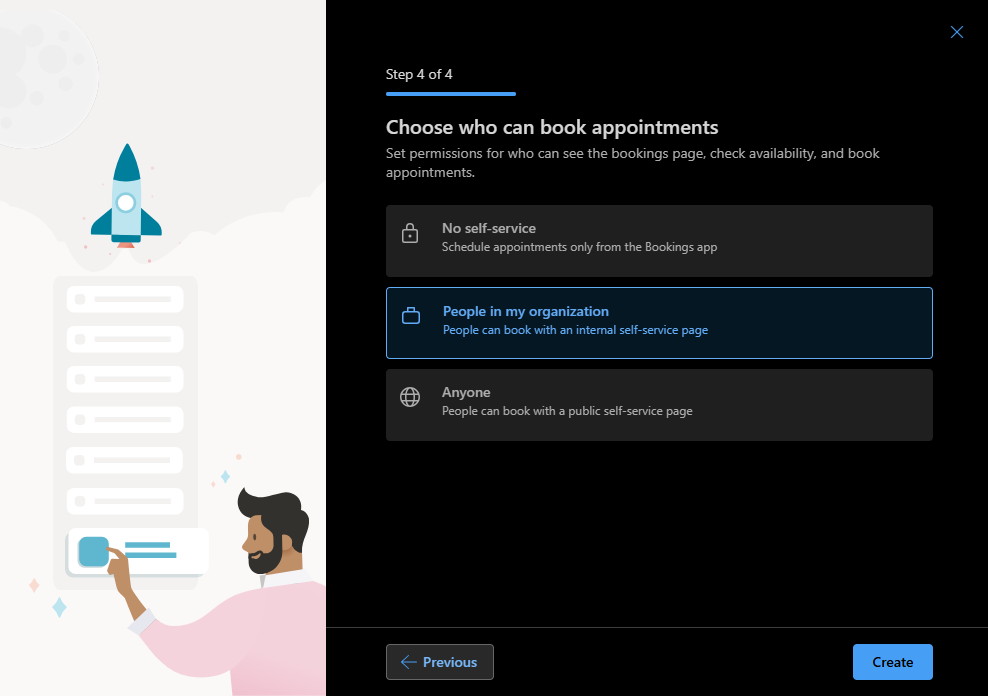
- Select Create.
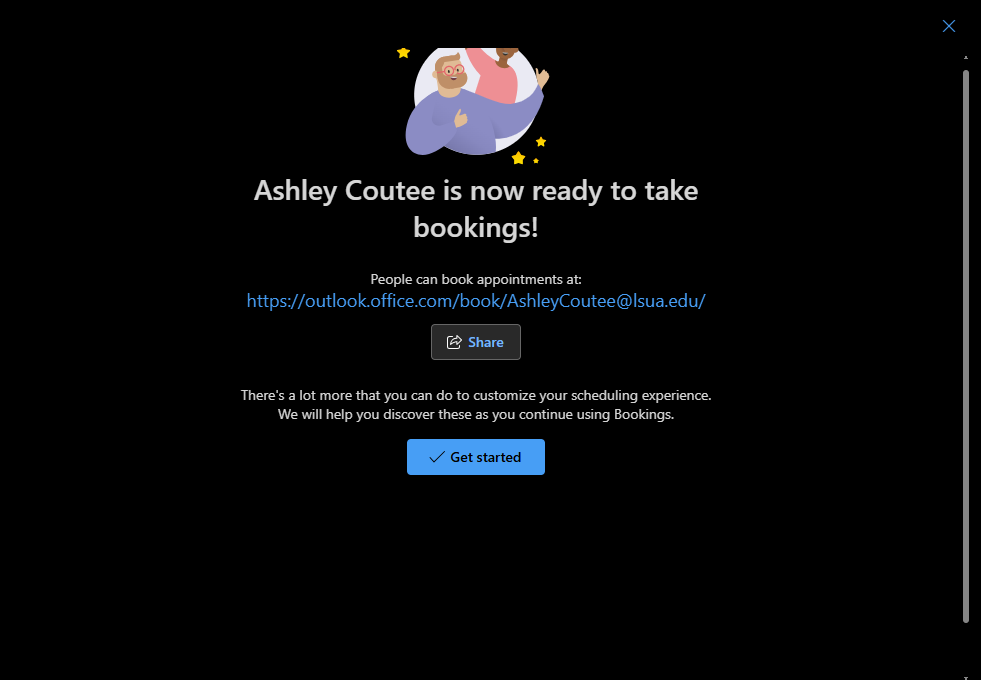
- Your booking page will be automatically created.
- Select Get started.
Step 3: Set Your Business Information
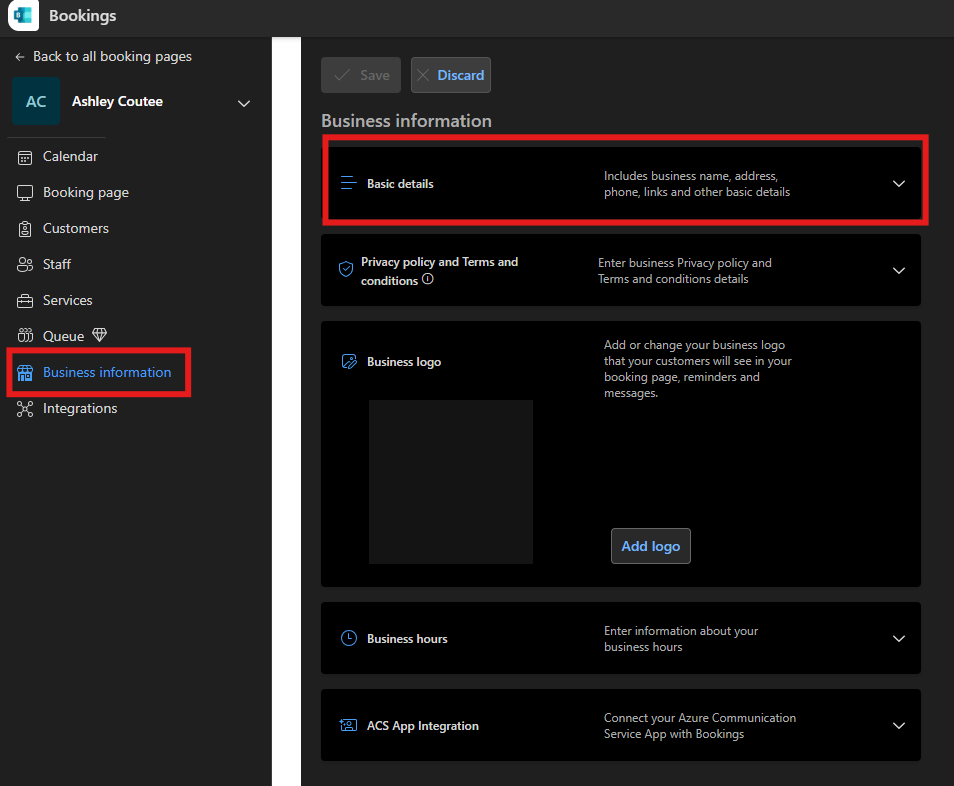
- Select Business Information from the left menu.
- Verify or update:
- Business Name
- Phone Number (optional)
- Email Address
- Office Location
- Click Save.
Step 4: Set Your Availability
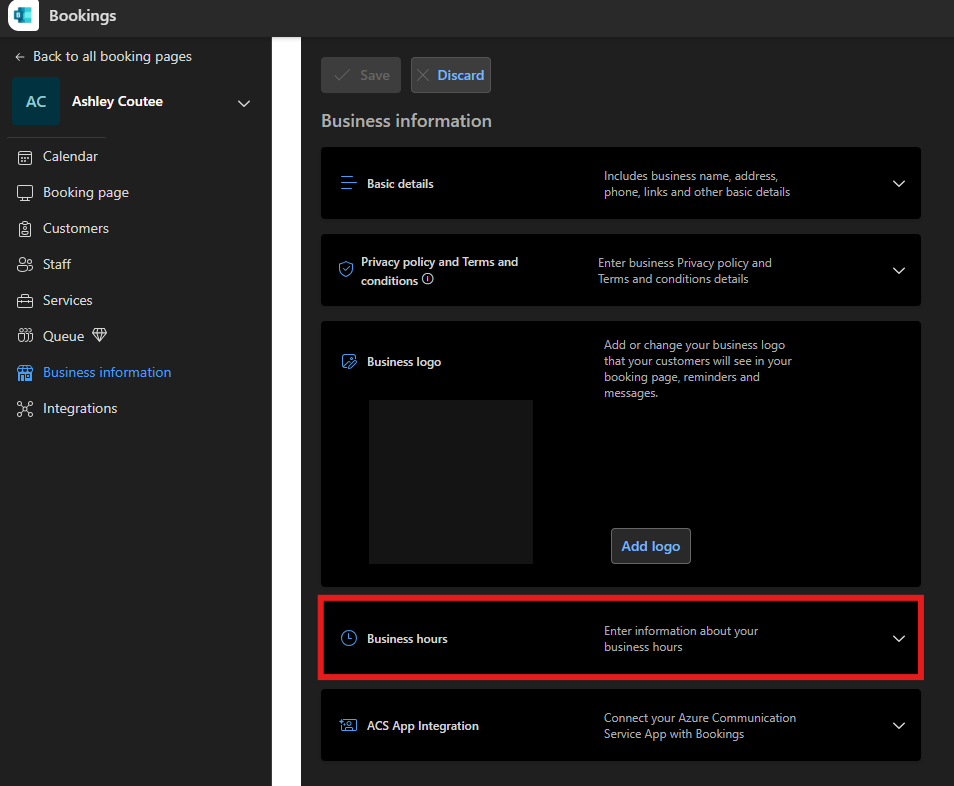
- Select Business Hours.
- Configure your available days and times.
Example:
| Day | Hours |
|---|---|
| Monday | 8:00 AM - 4:30 PM |
| Tuesday | 8:00 AM - 4:30 PM |
| Wednesday | 8:00 AM - 4:30 PM |
| Thursday | 8:00 AM - 4:30 PM |
| Friday | 8:00 AM - 12:00 PM |
Note: These hours define when appointments can be scheduled.
- Click Save.
Step 5: Add Yourself as Staff
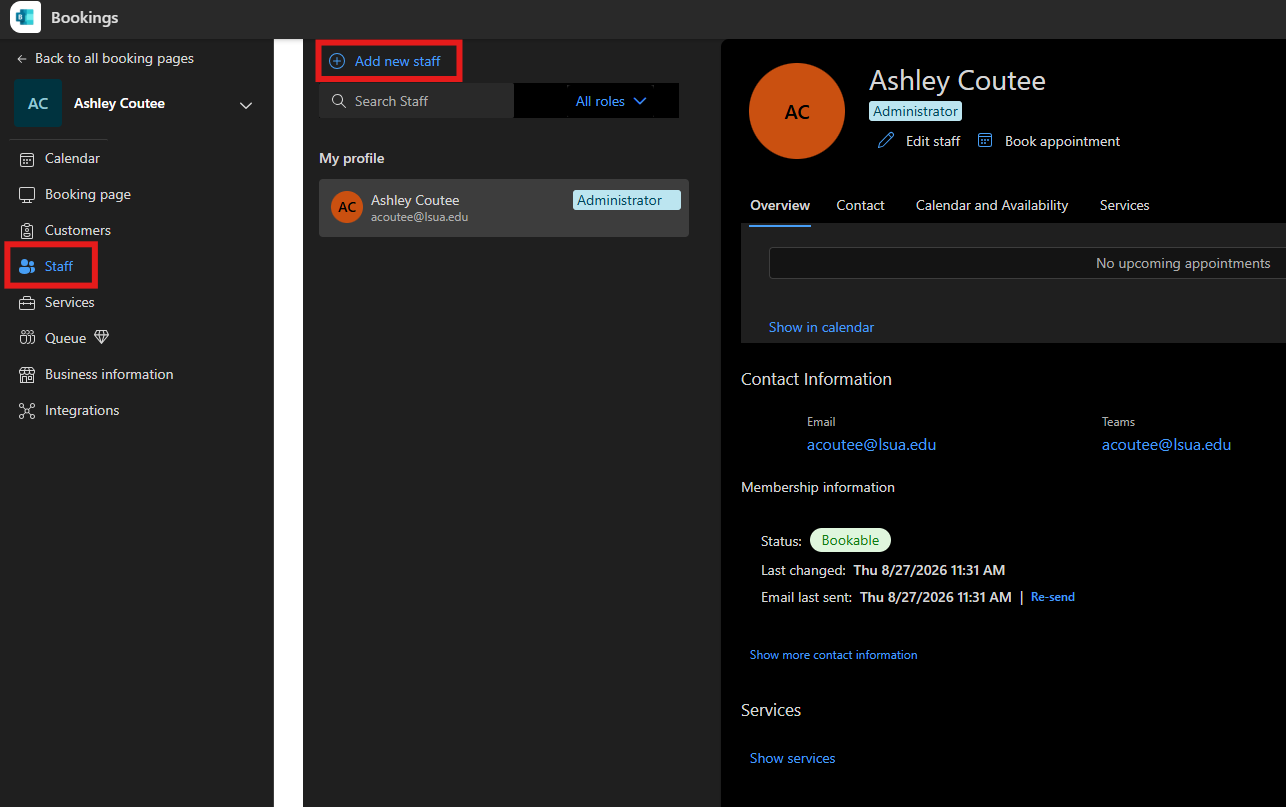
- Select Staff from the left navigation.
- Click Add new staff if you do not already appear.
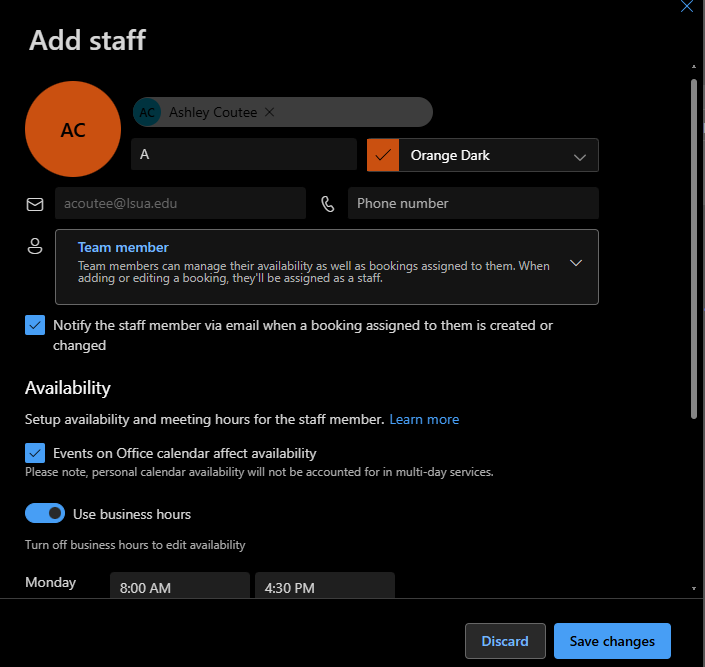
- Enter your LSUA email address and update any information in the window.
- Assign the role:
- Administrator (recommended for your own calendar)
- Click Save.
Step 6: Create an Appointment Type
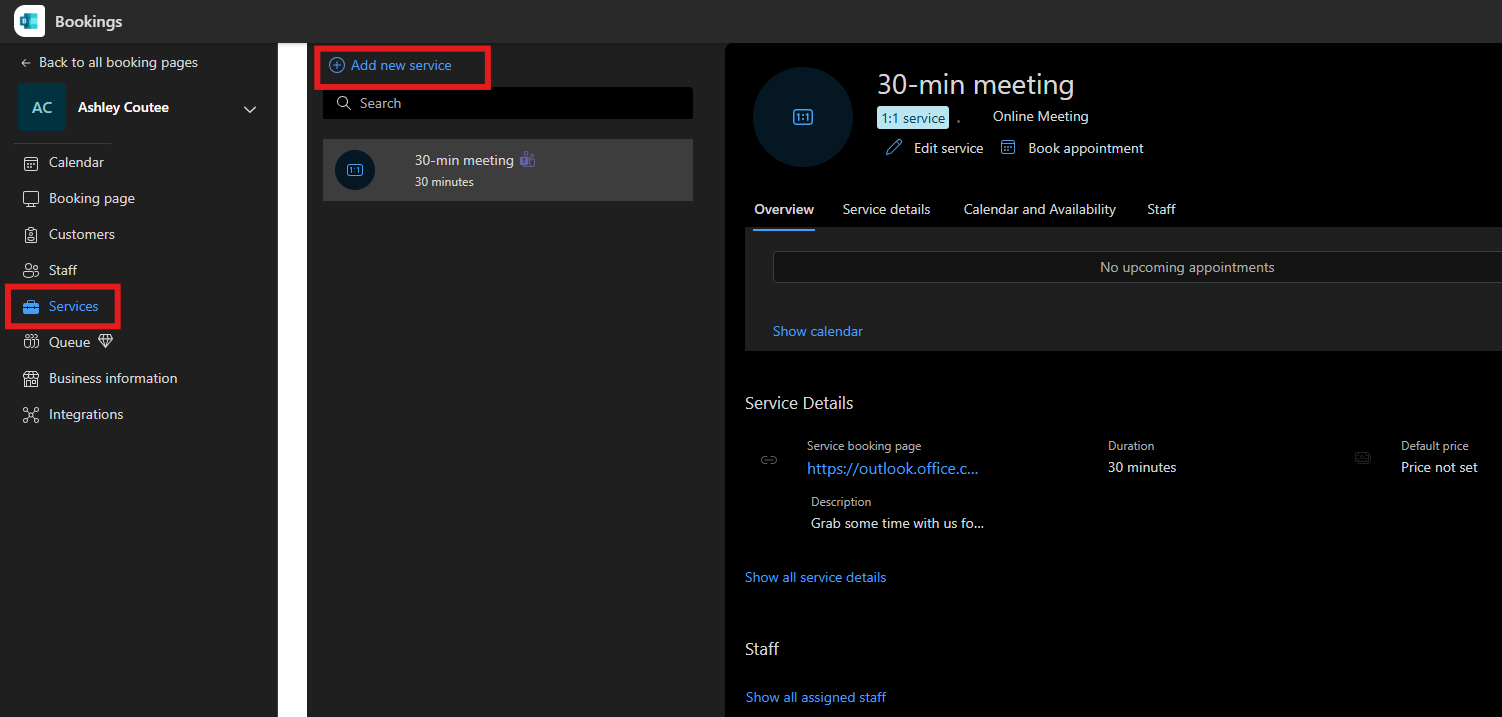
- Select Services.
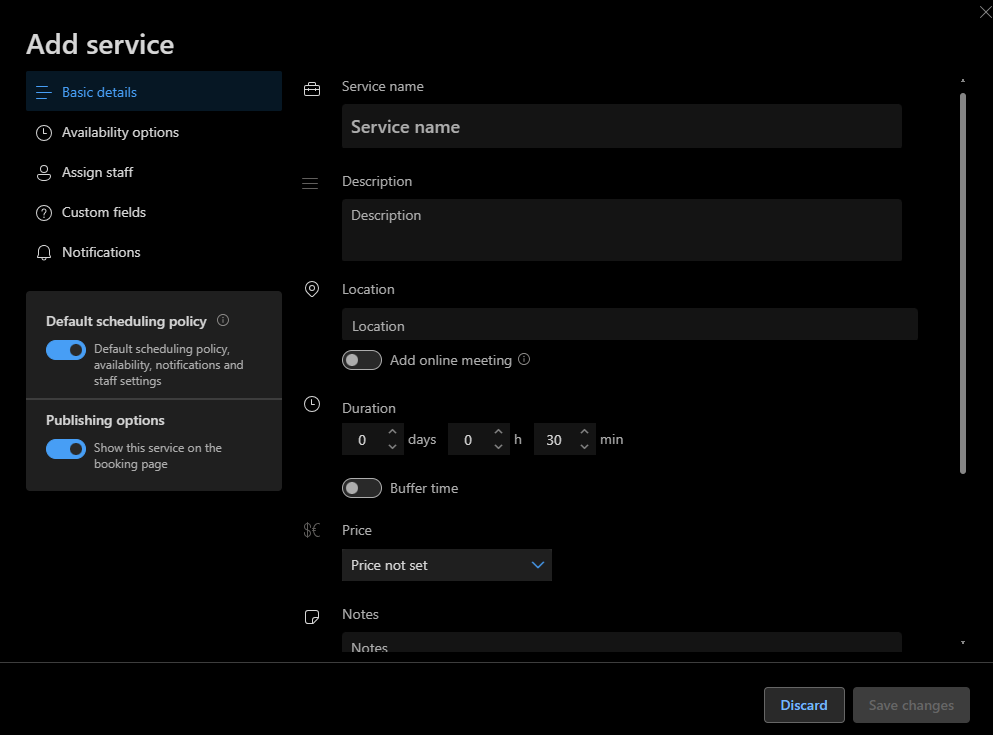
- Click Add a Service.
Example Service Information:
Service Name
- Student Advising Appointment
Description
- Meet with faculty advisor to discuss registration, degree plans, or academic concerns.
Duration
- 30 Minutes
Location
- Office, Teams Meeting, or Phone Call
Assigned Staff
- Select your name
- Click Save Changes.
Step 7: Configure Online Meetings (Optional)
If appointments should be virtual:
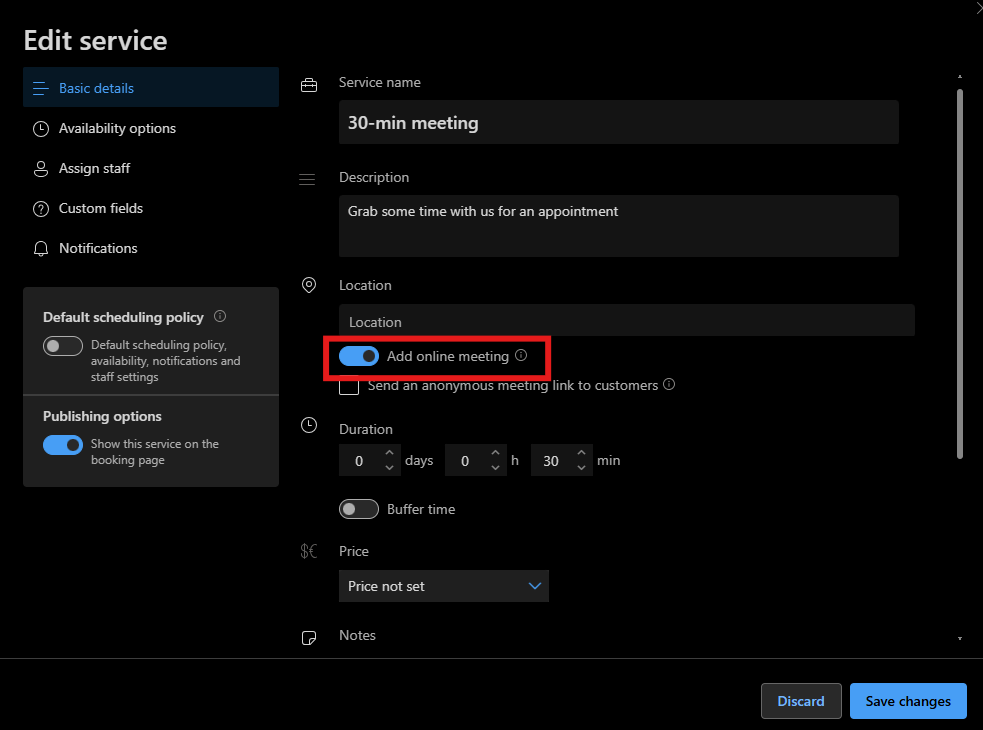
- Edit your service.
- Enable Add Online Meeting.
- Save changes.
Students who book appointments will automatically receive a Teams meeting link.
Step 8: Configure Your Booking Page
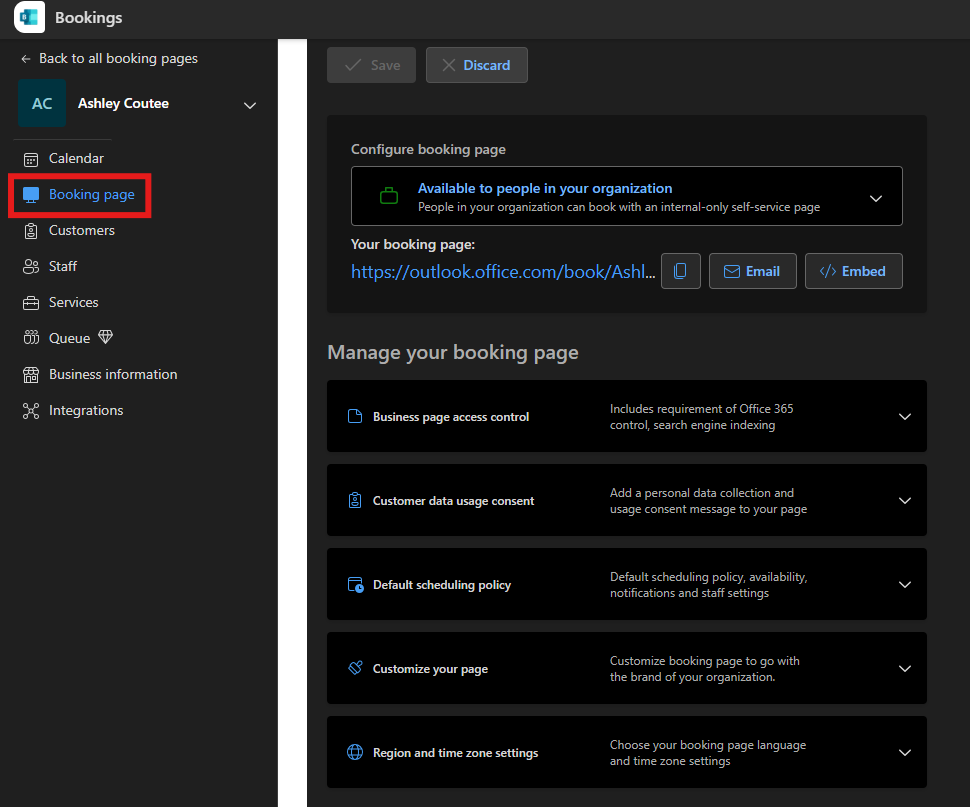
- Review:
- Scheduling policies
- Availability settings
- Email notifications
Click Save if any changes were made.
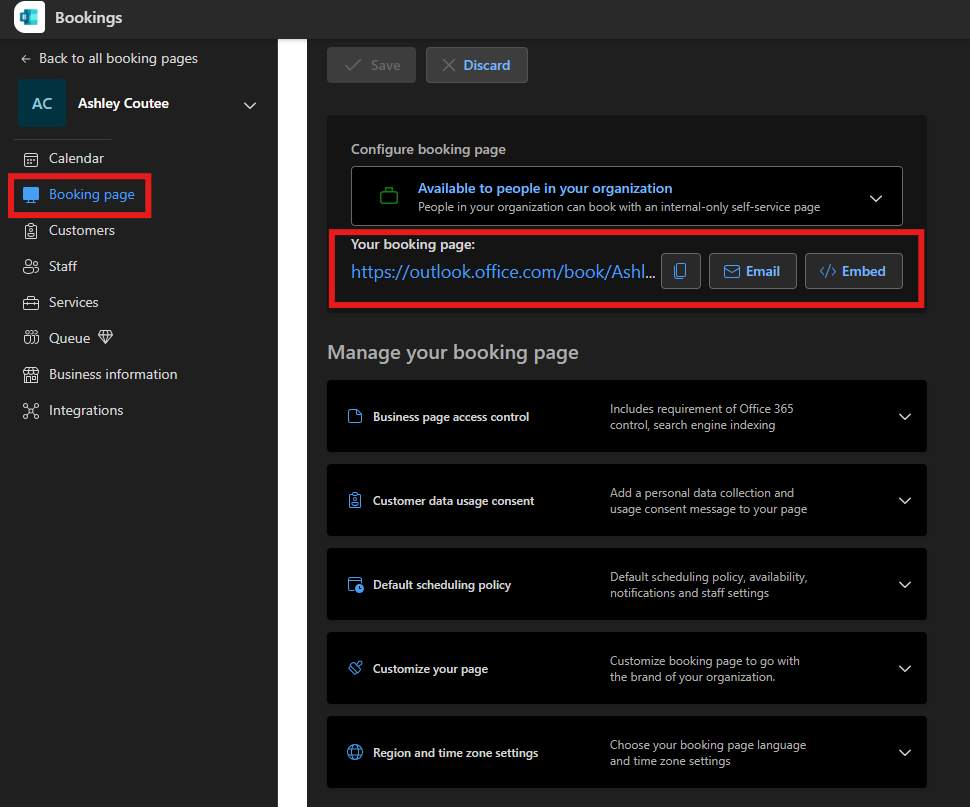
Step 9: Obtain Your Booking Link
- From the Booking Page, locate your booking URL.
- Click Copy Link.
The link will look similar to:
https://outlook.office.com/bookings/...
Step 10: Share Your Booking Page
Share the booking link in:
- Moodle courses
- Email signatures
- Department websites
- Microsoft Teams
- Canvas announcements (if applicable)
Example Email Signature:
Need to schedule an appointment?
Book a meeting with me: [Insert Booking Link]
Managing Appointments
To view scheduled appointments:
- Open Microsoft Bookings.
- Select Calendar.
- Click an appointment to:
- View details
- Reschedule
- Cancel
- Contact the attendee
Best Practices for Faculty
✅ Keep business hours up to date
✅ Create separate services for different appointment types
✅ Use Teams meetings for virtual appointments
✅ Test your booking page before sharing it with students
✅ Add the booking link to your email signature for easy access