
Overview
A shared mailbox allows multiple users to read and send email from a common mailbox, such as a department or office email account. Before adding a shared mailbox, you must be granted permission to access it.
Step 1: Sign In to Outlook on the Web
- Open a web browser.
- Sign in to your Microsoft 365 account.
- Open Outlook on the Web (OWA).
Step 2: Locate the Folders Pane
- In the left navigation pane, locate your mailbox folders.
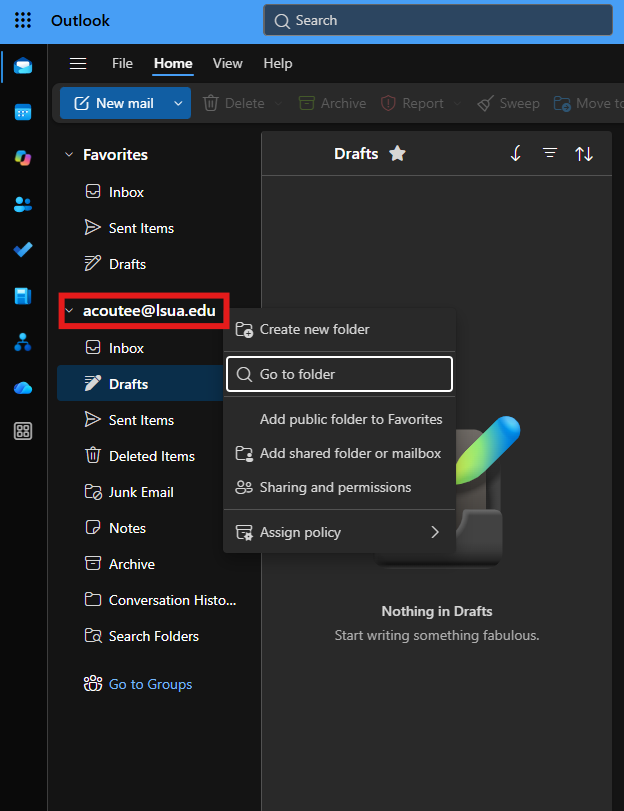
- Find your name or primary email account at the top of the folder list.
Step 3: Add the Shared Mailbox
Right-click your name or primary mailbox.
Select Add shared folder or mailbox.
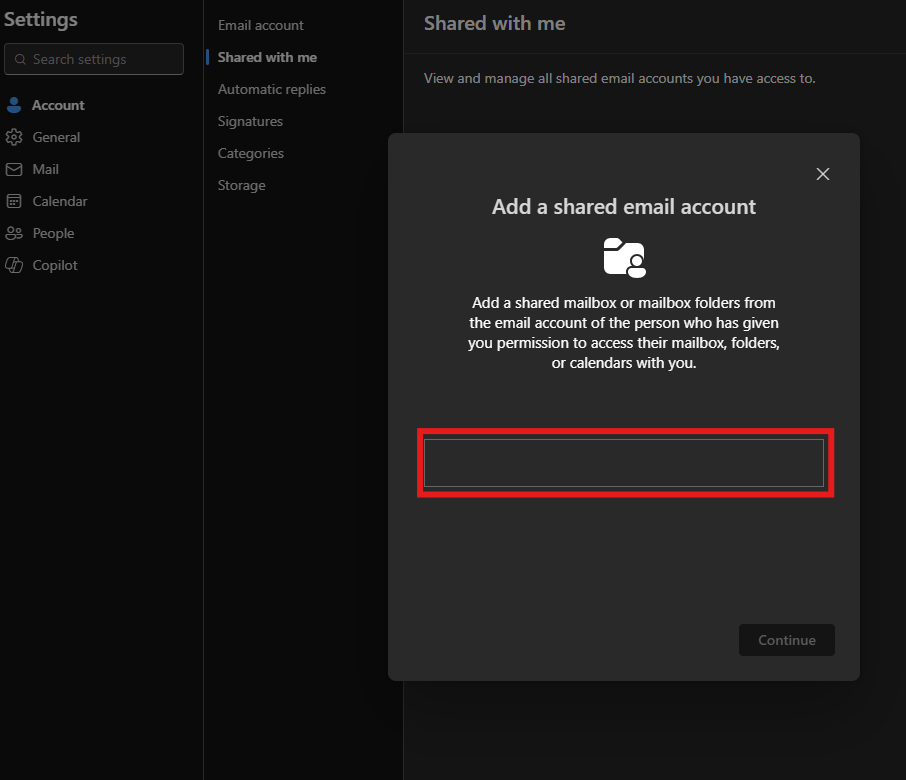
In the search box, enter the name or email address of the shared mailbox.
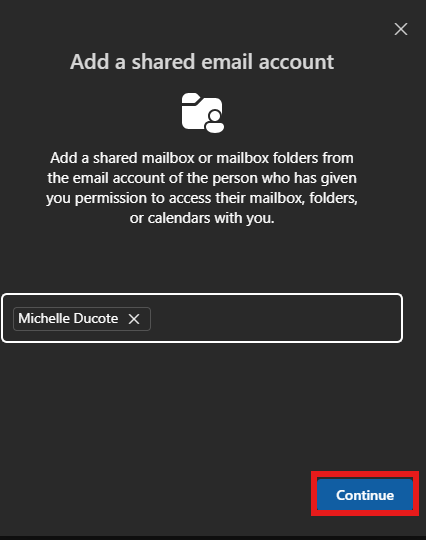
Select the shared mailbox from the search results.
Click Continue.
Step 4: Access the Shared Mailbox
- The shared mailbox will appear in the left navigation pane.
- Expand the mailbox to view:
- Inbox
- Sent Items
- Drafts
- Deleted Items
- Other available folders
Sending Email from a Shared Mailbox
Step 1: Create a New Message
- Select New Mail.
Step 2: Display the From Field
- If the From field is not visible, select Options > Show From or click From in the message window.
Step 3: Choose the Shared Mailbox
- Select From.
- Choose the shared mailbox address.
- Compose your email.
- Select Send.
Recipients will see the email as coming from the shared mailbox.
Removing a Shared Mailbox
- Right-click the shared mailbox in the folder pane.
- Select Remove shared folder or Remove shared mailbox.
- Confirm the removal if prompted.
Note: Removing the mailbox from Outlook does not remove your permissions to access it.