
Before getting started - Important NOTICE: If you have already imported content (that included H5P activities), please click into each H5P to check if it works. If it does not work or you receive an error message you will have to go into each H5P activity and update. (steps for this process is at the bottom of this guide)
If you have no content within your shell and you are importing H5P activities (Backup & Restore):
Step #1 - BACKUP
*please note, when you backup a course that has student submissions, those students and their submissions will be saved and brought over with the Restore.
- Open up the MCS of course (with working H5P activities) & in another browser, open the empty course shell that you are wanting to import the content into.
- Go into the MCS with working H5P activities
- Top of the Course, click on More
- Click on Course Reuse
- Select BACKUP
- In the Backup Settings section - your settings should match the snip below (you will only click off/unselect the blue box on Include enrolled users & Include groups and groupings - the others will be unselected automatically for you)
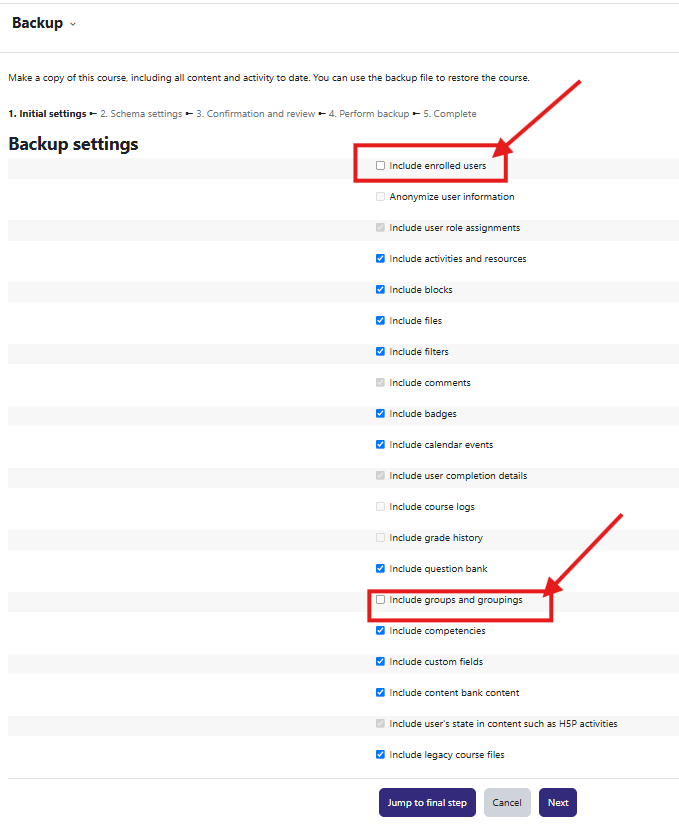
- You can either click Jump to final step or Next after you make your selections.
- Perform Backup - Backup in Progress (this will take a few minutes to complete)
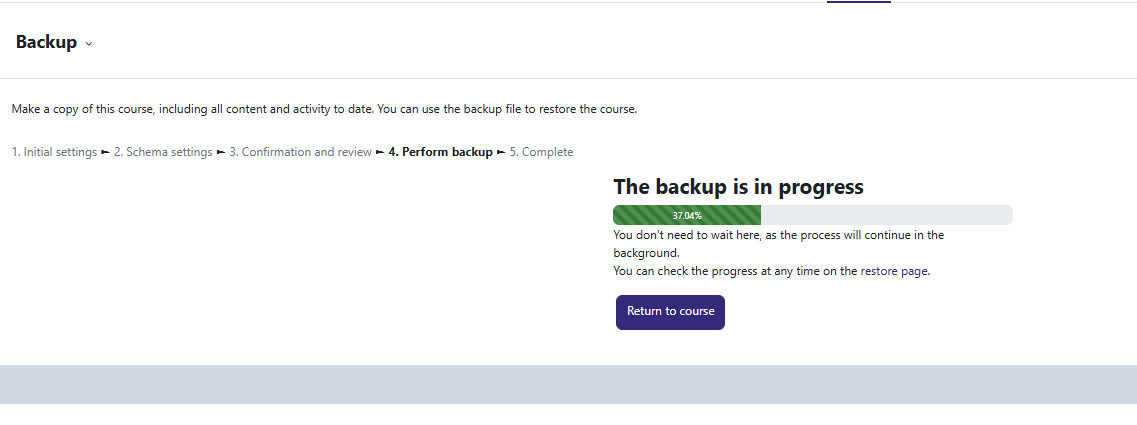
- Click Continue button - only when progress is at 100%
- In the Course Backup Area or User Private Backup Area - find the correct course name and number under the Filename column - click download (to download the .mbz file)
- This file can also be found by going into the Restore section
- You can click on Download (in blue)
- The download for the .mbz will take a few minutes
Step #2 - RESTORE
- Go into the new/empty course shell
- Click on MORE
- Select Course Reuse
- Select RESTORE
- In the Upload A Backup File Box - you will drag and drop the downloaded .mbz file
- This will take a few minutes
- Click purple RESTORE button- this will take a few minutes
- Review and Continue: Proceed through the confirmation steps. You can usually leave the default settings and click Continue at the bottom of the pages.
- Under the Restore into this course section you will click on Continue
- Double Check your selections on the Restore Settings page
- Click Next
- Scroll down to the bottom of the page, click Next
- Finalize: On the final review page at the bottom, click Perform Restore.
- The Restore is In Progress will take some time - please be patient (the green bar will have to reach 100% - do not leave the page)
- Once the green bar has reached 100% you can click the Continue button
- The content will be imported into the course - always double check the H5P activities to ensure they are working.
________________________________________________________________________________________________________
If you have imported content (that includes H5Ps) and the H5Ps DO NOT WORK, these steps will help you update.
Please note, you will have to repeat these steps for EVERY H5P activity within your course.
- Open the original/previous course where the H5P is working correctly
- Open another browser tab with content that contains the NOT working H5Ps
- Toggle on Edit Mode
- In the NOT working H5P course - find the H5P assignment that is not working, write down the name of that activity.
- Now click into the original/previous course (with working H5P). At the top of the course page, click on More, click on Content Bank.
- You will see all H5Ps - find the activity that you wrote down and click into it
- Click on the grey MORE button and select Download - file will download
- Click back into the NOT working H5P course - find the H5P assignment that is not working (that you wrote down), click into the activity
- Click the Settings tab for that activity
- In the Description box - find the appropriate space to paste the H5P and put your cursor there
- Click onto the H5P icon in the description box tool bar, you will get a pop up screen
- Click on Browse Repositories - Upload a file, Choose a file and go to your downloads and find the H5P activity
- Click the Upload this file button then click Insert H5P Content
- Once it is inserted you can click the Save and Display button
- Double check your H5P activity to ensure it is working.
Any further questions or concerns can be directed to Michelle Ducote (mcloud@lsua.edu)