
What Is a Scheduling Poll?
Scheduling Poll (formerly FindTime) allows faculty to:
- Propose multiple meeting times.
- Allow attendees to vote on their availability.
- Automatically schedule a meeting when a consensus is reached.
- Reduce back-and-forth emails when coordinating meetings.
Common uses include:
- Department meetings
- Committee meetings
- Student organization meetings
- Faculty collaboration sessions
- Advising appointments
Step 1: Create a New Email
- Open Outlook.
- Select New Email.
- Enter the email addresses of the individuals you would like to invite.
Step 2: Open Scheduling Poll
In New Outlook or Outlook on the Web
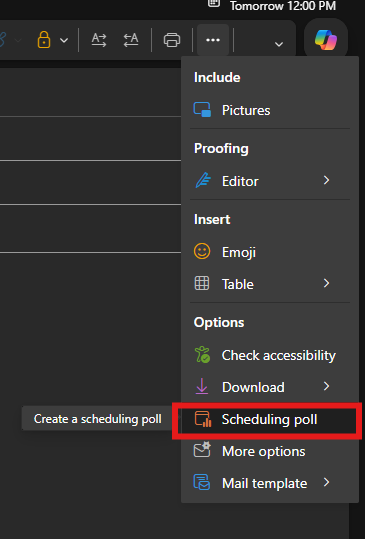
- In the new message window, select the three dots (...) on the toolbar.

- Choose Scheduling Poll.
Step 3: Select Meeting Duration
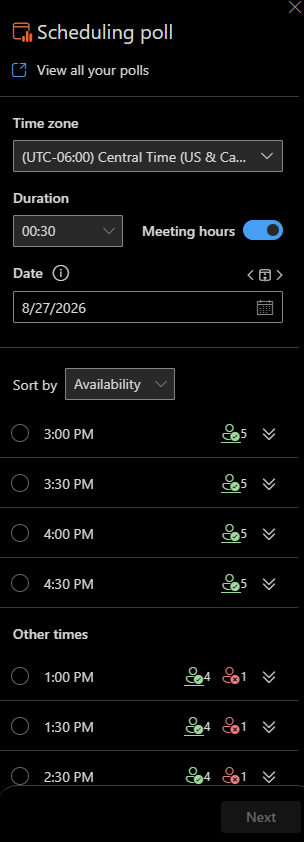
The Scheduling Poll pane will open on the right side of the screen.
- Select the desired meeting duration.
Examples:
- 30 minutes
- 60 minutes
- 90 minutes
- 2 hours
Step 4: Choose Meeting Dates and Times
- Review the suggested dates and times.
- Select several options for attendees to choose from, then select Next.
Best Practice: Offer at least three to five meeting options.
Selected times will be added to the poll.
Step 5: Configure Poll Settings
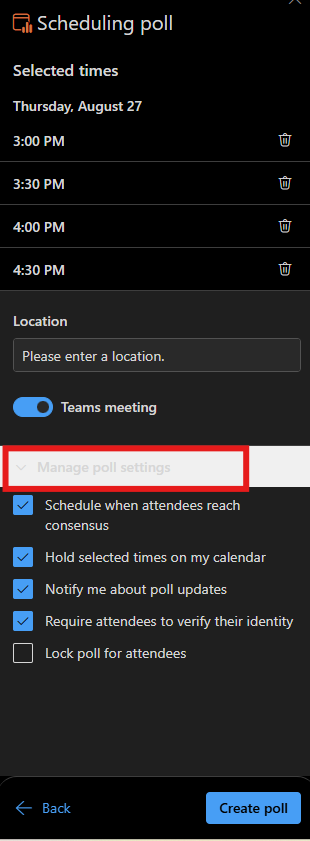
Select Manage Poll Settings or the settings icon.
Recommended settings:
✅ Schedule when attendees reach consensus
✅ Hold selected times on my calendar
✅ Notify me about poll updates
Optional settings:
☐ Require attendees to verify their identity
☐ Lock poll for attendees
Step 6: Create the Poll
- Review the selected dates and times.
- Select Create Poll.
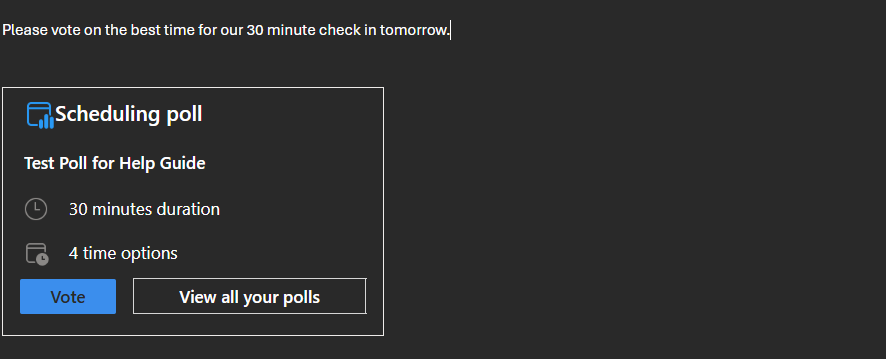
The poll will automatically be inserted into your email message.
Step 7: Add Instructions for Attendees
Above the scheduling poll, add a brief message.
Example
Please select all dates and times that work for your schedule. Once responses are received, a meeting invitation will be sent for the selected time.
Step 8: Send the Poll
- Review your recipients and poll options.
- Select Send.
Attendees will receive an email containing a link to the scheduling poll.
How Attendees Respond
Recipients can:
- Open the email.
- Select the poll link.
- Indicate their availability for each proposed time.
- Submit their responses.
Response options may include:
- Preferred
- Yes
- No
Viewing Responses
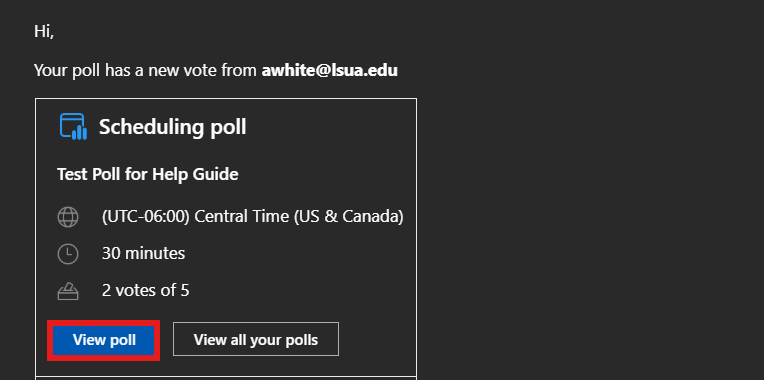
- Open the original email from your Sent Items folder.
- Select View Poll.
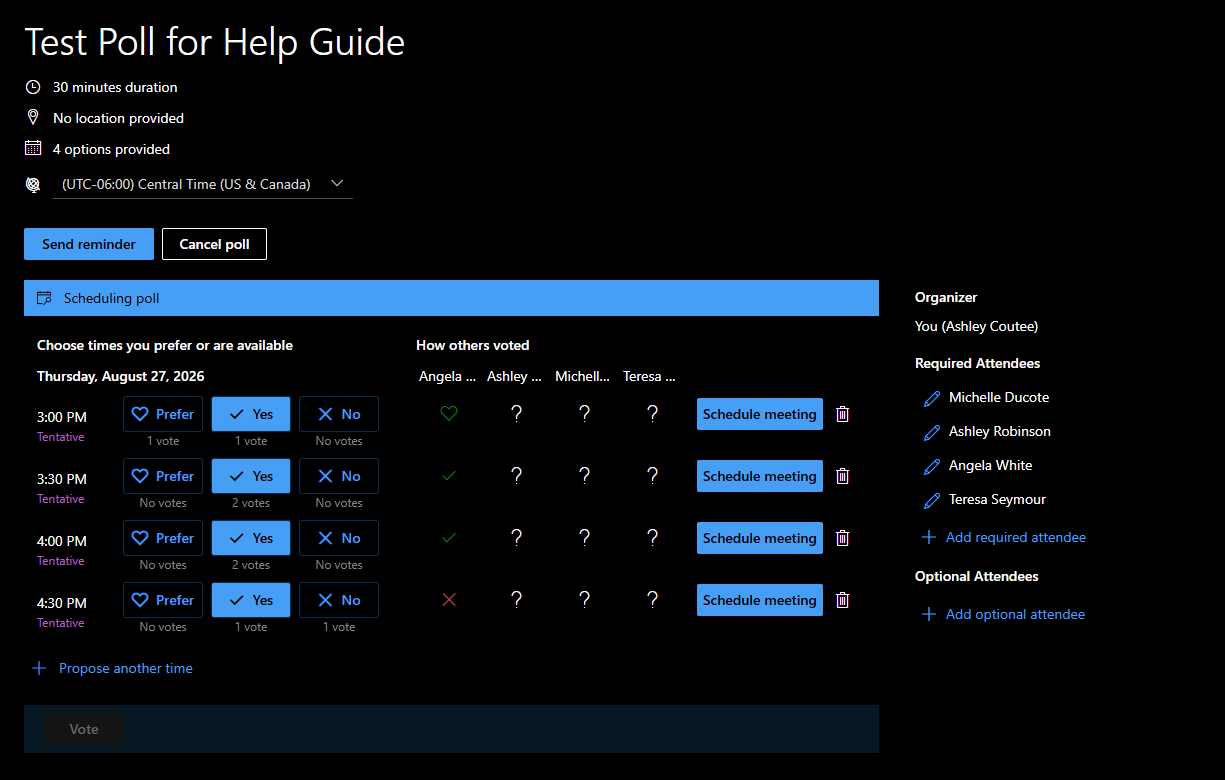
From the poll page, you can:
- Monitor responses.
- View attendee availability.
- See who has not responded.
- Send reminders if needed.
Scheduling the Meeting
Automatic Scheduling
If Schedule when attendees reach consensus was enabled:
- The meeting is automatically scheduled.
- Invitations are sent to attendees.
- The meeting is added to your calendar.
Manual Scheduling
- Open the poll.
- Review attendee responses.
- Select the preferred meeting time.
- Choose Schedule Meeting.
Best Practices
✅ Include all attendees before creating the poll.
✅ Offer several meeting options.
✅ Hold selected times on your calendar.
✅ Use Microsoft Teams for virtual meetings.
✅ Monitor responses and send reminders as needed.
✅ Enable automatic scheduling when appropriate.